Brands and Document Branding
What It's For
These two screens decide how your agency looks in what the agents produce. Brands is the list of brands your install runs, with the look of each brand's automatic blog images. Document Branding sets the name, colours, typeface and logos on the PDFs the tools generate, such as estimates, statements of work, proposals and audits. In the Operator Console, under Agency, open Brands or Document Branding.
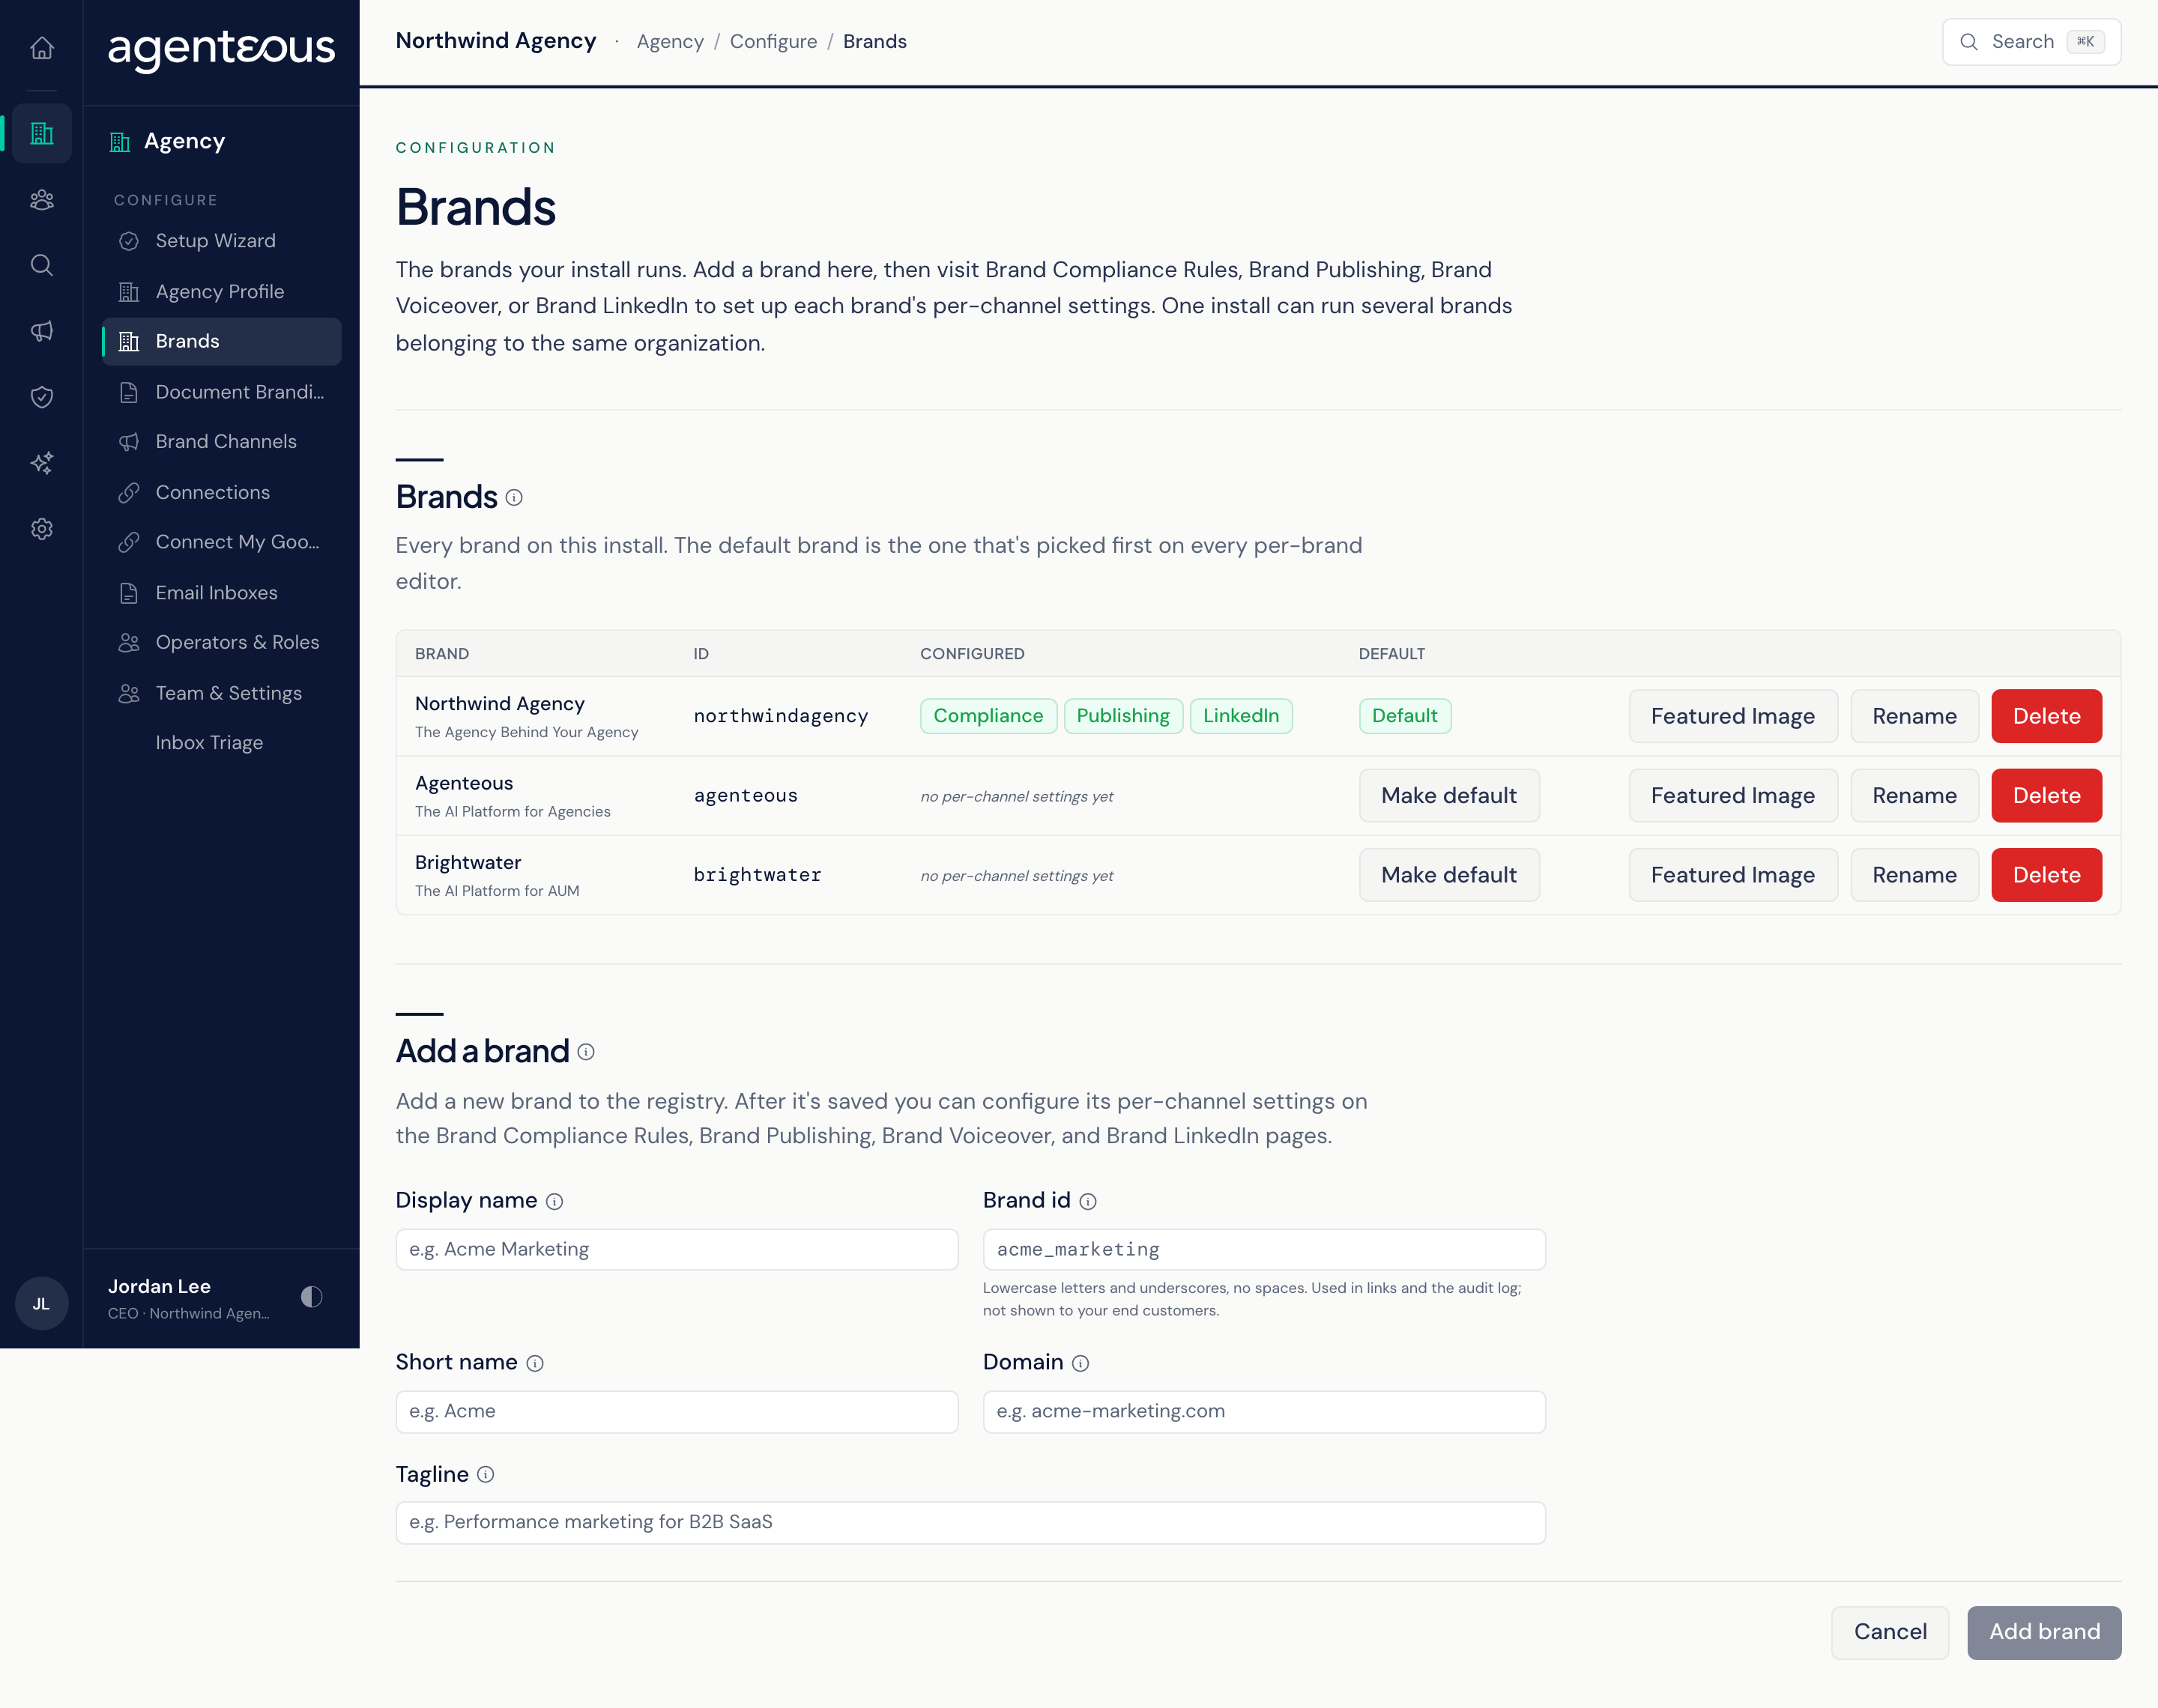
Brands
One install can run several brands that belong to the same organization. Each brand keeps its own per-channel settings, which you set on Brand Channels and Brand Compliance.
The Brands List
Each row shows the Brand name, its ID, a Configured column listing which per-channel settings it has (Compliance, Publishing, Voiceover, LinkedIn), and a Default marker. The default brand is the one picked first on every per-brand screen.
Row actions:
- Make Default makes this brand the default.
- Rename opens a form to change the display name, short name, domain and tagline. This renames the brand only: the agency's own name is set in Agency Profile. The brand id never changes, so its settings stay linked.
- Featured Image opens the brand's blog image settings (below).
- Delete removes the brand for good. You cannot delete the default brand (pick another default first), or a brand that still has per-channel settings. Syndication counts too: if any syndication platform is switched off for the brand, clear that first, even though the Configured column does not show it.
Add a Brand
Enter a Display Name (what people see in pickers and reports) and a Brand Id. The id is filled in from the display name; it may use only lowercase letters, numbers and underscores, and cannot be changed after you save. Short Name, Domain and Tagline are optional; the tagline is given to the agents as context when they draft for this brand. Press Add Brand. The first brand on a new install becomes the default automatically.
Featured Image
Sets how the automatically generated featured images for this brand's blog posts look. Upload a Logo (SVG) of up to 2 MB, pick a Primary Color and Secondary Color, and choose a Template Style: Minimal / Clean, Bold Gradient, Split Layout, Dark Card or Photo Overlay. Press Preview to render a sample image with a placeholder title, then Save Featured Image Settings.
Document Branding
The brand your generated documents carry. Until you customize it, documents use a built-in default brand; a badge at the top reads Default Brand or Custom Brand Active. If document rendering is not available on your install yet, the page says so; you can still set up your brand and it applies once rendering is on.
These settings are separate from Agency Profile. Changing your agency name here does not change it there, and the other way round.
Agency Identity
Agency Name (required), Tagline (shown under the name on covers), Website, Booking Link (where the closing page's call to action points, usually a meeting scheduler; leave it blank for no booking prompt) and up to four About Stats, short figure and caption pairs shown on the closing page.
Brand Colors
Pick a Primary colour and the whole document theme is derived from it: headings, covers, tables, backgrounds and dividers. Secondary and Accent are optional; leave them unset and complementary colours are chosen for you.
Typeface
Choose a Font from a curated set of Google Fonts, or keep House Default. The font files are embedded when you save, so documents look the same everywhere. If the font cannot be fetched, nothing is saved and you can try again.
Logos
Logo On Light Backgrounds is required, SVG or transparent PNG up to 2 MB. Logo On Dark Backgrounds is optional; without it the light logo is reused on dark covers.
Press Save Brand to apply your settings to every new document. Reset To Default Brand removes your custom brand and returns documents to the built-in one.
Who Uses It
- Ops Admin, Admin Operator and CCO: add, rename, delete and set the default brand, and save featured image settings. Each change is recorded in the Audit Log.
- Anyone signed in to the console: can save or reset Document Branding.